
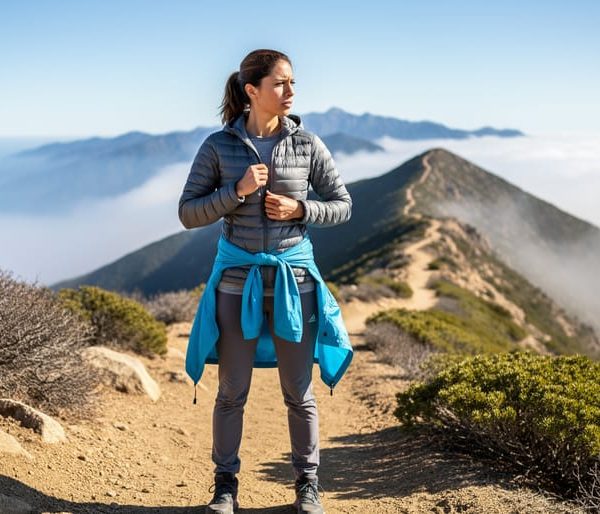
Putting together a hiking outfit for cold-weather California trails takes three layers and one smart rule: prepare for 40-degree swings between trailhead and summit. Unlike Colorado or other high-alpine zones, California’s cold-weather hiking throws curveballs like intense sun exposure at elevation, bone-dry air that wicks moisture faster than you’d expect, and microclimates that shift from coastal fog to desert-bright ridgelines in a single afternoon. The right outfit protects you from hypothermia without turning you into a walking sauna halfway up the trail.
Most California winter hikes stay in the 20°F to 50°F range, but conditions change fast. You need a moisture-wicking base layer that pulls sweat off your skin, an insulating mid-layer that traps heat without bulk, and a windproof or waterproof shell that blocks mountain gusts without cooking you from the inside. The trick is balancing warmth with ventilation, and that’s where most hikers stumble.
This guide walks you through assembling a cold-weather hiking outfit step by step, from choosing the right fabrics to testing your setup before you hit the trail. You’ll learn which materials work in California’s drier cold, how to adjust layers on the move, and what safety checks to run before you leave the parking lot. Whether you’re planning a dawn start on Mount Baldy or a midwinter trek through the Sierra foothills, getting your outfit right means the difference between a memorable hike and a miserable march back to the car.
Essential Layers and Materials You’ll Need
Base Layer Essentials
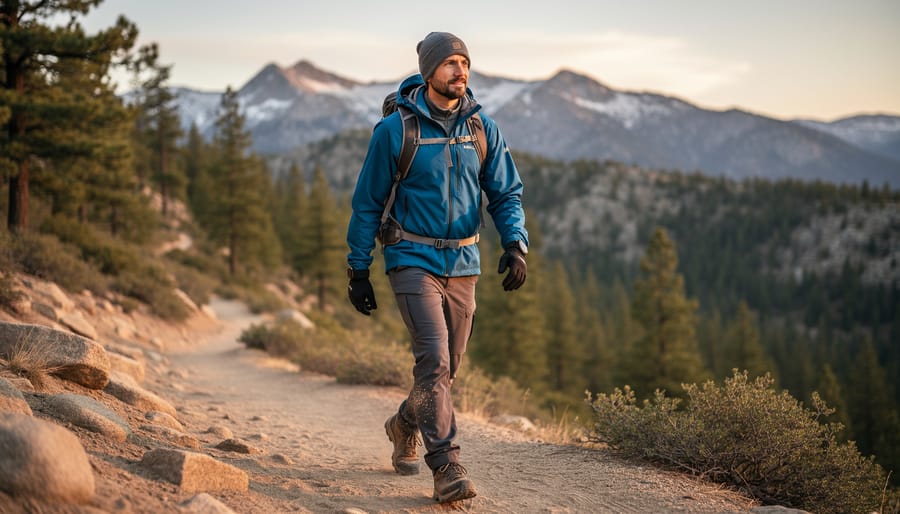
Your base layer sits against your skin and does one critical job: move sweat away from your body so you don’t get chilled. Cotton fails at this completely, once wet, it stays wet and robs your body heat. Never wear cotton as a base layer in cold weather.
You have two proven choices: merino wool or synthetic fabrics like polyester. Merino wool regulates temperature beautifully, resists odor even on multi-day trips, and stays warm when damp. The downside? It costs more and wears out faster. Synthetics dry faster, last longer, and cost less, but they can smell ripe by day two.
For fit, women’s base layers should feel snug without restricting movement, think second skin, not compression gear. Avoid bunching under your armpits or waistband, which causes chafing on long hikes. The fabric should lie flat across your chest and shoulders.
Base layer weight matters: lightweight for active hiking in temperatures above 40°F, midweight for 20-40°F, and heavyweight below 20°F or for slow-paced trips. Most California cold-weather hikes need lightweight to midweight layers since you’re generating heat while climbing elevation.
Insulation Layer Options
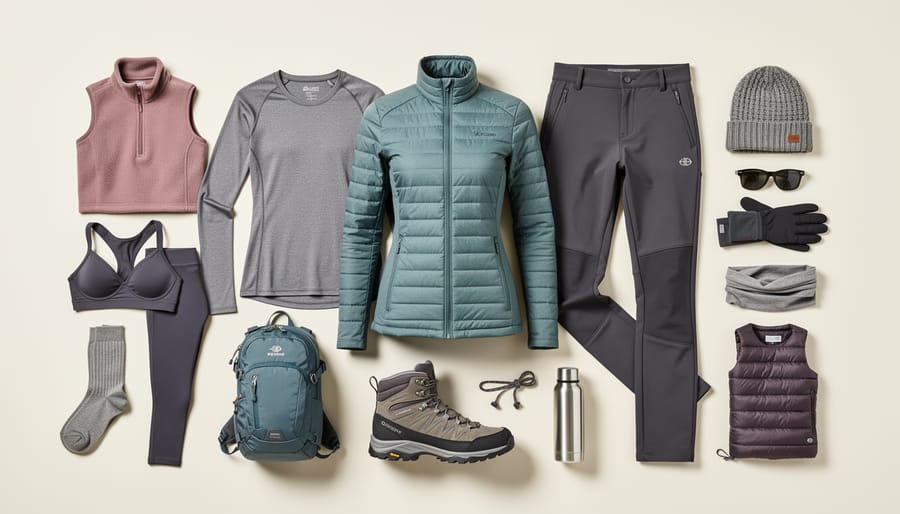
Your insulation layer traps warm air and provides the bulk of your warmth when you stop moving. For California hiking, you’ll encounter two main scenarios: the steady cold of high-elevation trails and the dramatic temperature swings between shaded canyons and exposed ridges.
Down insulation offers the best warmth-to-weight ratio and compresses small in your pack, critical when you’re carrying it “just in case.” It excels in California’s dry mountain air but loses all insulating power when wet. Synthetic insulation weighs more and packs bulkier, but continues warming even if damp from unexpected drizzle or sweat.
For active hiking, a midweight fleece jacket works perfectly as your moving layer. It breathes well during climbs and provides enough warmth for 30-50°F conditions. Keep a lightweight down or synthetic puffy jacket in your pack for summit stops and lunch breaks, you’ll cool down fast once you quit moving.
Below 6,000 feet in winter, a fleece alone often suffices. Above 8,000 feet or in wind, plan on wearing both fleece and puffy layers. The key is starting your hike slightly chilled; if you’re warm at the trailhead, you’ll be overheated within fifteen minutes.
Outer Shell Protection
Your outer shell is your first line of defense against California’s unpredictable mountain weather. Here’s what actually matters when choosing one.
Waterproof vs water-resistant isn’t just marketing speak. A waterproof shell (rated 10,000mm+) keeps you dry in sustained rain or wet snow. Water-resistant fabrics repel light drizzle but will soak through after 20 minutes of steady precipitation. For California’s typically dry conditions, water-resistant often suffices unless you’re hiking Sierra Nevada peaks in spring or caught in coastal storm systems that push inland.
Windproofing matters more than most women realize. Wind cuts through fleece and down like they’re not there, dropping your effective temperature by 20 degrees. A proper shell blocks wind completely while remaining breathable enough that you don’t cook in your own moisture on the uphill.
That breathability factor is critical. Cheap shells trap sweat, leaving you clammy and cold when you stop moving. Look for pit zips as your temperature regulation safety valve. On steep California climbs where you gain 2,000 feet in three miles, you’ll unzip those vents within the first half-mile.
The shell should fit loosely enough to layer a puffy jacket underneath but not so baggy that wind catches the fabric and chills you.
Safety Warnings: What Not to Wear and When to Turn Back

Cotton kills in cold weather. It absorbs moisture from sweat or rain, loses all insulating ability when wet, and pulls heat from your body far faster than you’d expect. Skip the cotton leggings, cotton underwear, and any cotton base layers entirely, no exceptions. Synthetic fabrics and merino wool dry quickly and retain warmth even when damp, which matters when you’re three miles from the trailhead and starting to shiver.
Recognize the progression of hypothermia before it becomes dangerous. Mild hypothermia starts with uncontrollable shivering and cold extremities. You’ll feel clumsy, your fingers won’t work right. As it worsens, shivering may stop entirely, which seems like improvement but signals a medical emergency. Confusion sets in, decision-making fails, and when alertness is lost the situation turns critical fast.
California’s mountains present specific hazards that catch people off guard. The Sierra Nevada generates weather changes with shocking speed, clear morning skies turn to whiteout conditions in under an hour at elevation. Coastal trails face a different threat: fog rolls in thick and wet, soaking through inadequate shells and chilling you in what started as a mild day. That moisture combined with wind creates dangerous conditions even at temperatures above freezing.
Turn back if the weather deteriorates beyond what your outfit handles. Getting caught in sleet with only a water-resistant jacket means trouble. If wind picks up enough that you can’t hear your hiking partner without shouting, conditions exceed safe limits for most recreational hikers. Don’t push through when you’re already cold and the trail climbs higher into worsening weather.
Trust your gut when something feels wrong. Pressed to make the summit or complete your planned mileage, people ignore early warning signs. The mountain will be there next weekend. Your safety matters more than any trail.
Step-by-Step: Assembling Your Outfit from Skin Out
Step 1: Start with Your Base Layer
Pull your base layer on against bare skin and check the fit immediately. It should feel snug without binding, you want full contact with your skin for moisture transfer, but you need freedom to move your arms overhead and bend at the waist. If you can pinch more than half an inch of fabric away from your body, size down. Bunching fabric traps cold air pockets and defeats the wicking purpose.
For California’s variable mountain temperatures, lightweight base layers (150-200 weight) work for most fall and spring conditions when you’re moving. Midweight (200-250) handles true winter in the Sierra Nevada or early morning starts. The fabric matters more than thickness. Merino wool regulates temperature better and resists odor, while synthetics dry faster and cost less. Both beat cotton, which sits at the top of safety priorities as something to avoid in cold weather.
Test your base layer on a quick walk around the block before committing to a five-mile climb. You should feel slightly cool at first. If you’re already warm standing still, you’ll overheat within twenty minutes of hiking.
Step 2: Add Insulation Based on Conditions
Once your base layer is on, it’s time to make the critical insulation decision. Here’s the key: you should feel slightly chilly when you first start hiking. Your body will generate significant heat within 10-15 minutes of moving, and overdressing at the trailhead guarantees you’ll be sweating uncomfortably by the first switchback.
For temperatures between 35-50°F, a single fleece midlayer often suffices. Choose a lightweight fleece (100-200 weight) for active hiking. Zip it down or remove it entirely once you’re warmed up.
Below 35°F or in windy conditions, add a puffy insulated jacket. Down works beautifully in California’s typically dry cold, packing smaller than synthetic options. However, if rain is forecasted, synthetic insulation remains your safer bet since it insulates when wet.
The uphill overheating problem is real. Strip down to just your base layer if needed, even if it feels counterintuitive. Carry your insulation layer in your pack and put it back on immediately when you stop for breaks. Sweat-soaked layers lose insulating ability and can chill you dangerously fast during rest stops.
Step 3: Top with Your Shell Layer
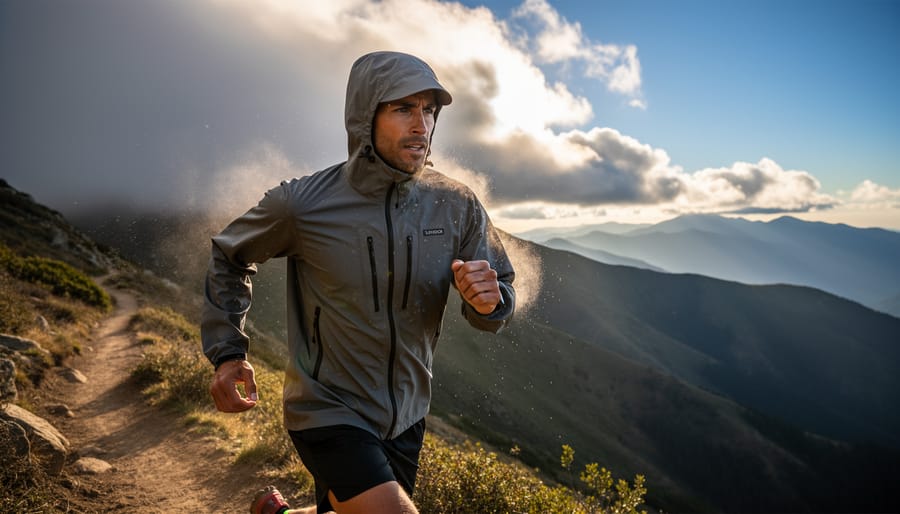
Your shell layer is your first line of defense against wind and precipitation, so it needs to fit correctly over everything you’re already wearing. Put it on and raise your arms overhead, then reach across your body, if the jacket rides up or pulls tight across your shoulders, you’ll be uncomfortable and restricted on the trail.
Check that your shell’s pit zips open fully and smoothly. These are your primary ventilation system when you’re working hard uphill. Open them before you start sweating, not after. Most women wait too long and end up soaked from the inside.
Adjust the hood so it moves with your head when you turn, you need peripheral vision on technical terrain. Tighten the drawcords just enough to keep wind out but loose enough to look around without the hood blocking your view. Cinch the hem and cuffs to seal out drafts without cutting off circulation.
Step 4: Protect Your Extremities
Your hands and feet lose heat rapidly in cold conditions, so protecting extremities isn’t optional. Start with a warm hat that covers your ears, merino wool or synthetic fleece works well, and a cuff you can pull over your ears matters more than style. California’s intense sun at elevation means you’ll want something you can stuff in your pack when you warm up.
For hands, bring two options: lightweight fleece gloves for moderate cold and warmer insulated gloves or mittens for extreme conditions. Mittens keep hands warmer than gloves because your fingers share heat, but they reduce dexterity. Many California hikers carry glove liners that work alone when moving hard uphill, then add outer shells when stopped or on exposed ridges.
Socks deserve careful attention. Wear merino wool hiking socks that fit your boot without bunching, thickness depends on your boot fit and conditions, but medium-weight works for most California cold weather. Never wear cotton socks. If you’re hiking in snow, consider lightweight gaiters to keep snow out of your boots and your lower legs dry.
A neck gaiter or buff protects your neck and can pull up over your face in wind. It’s more versatile than a scarf and won’t catch on branches.
Step 5: Choose Appropriate Bottoms
Your legs generate heat while hiking, so resist the urge to overdress your lower half. For most California cold-weather hikes, synthetic hiking pants or thick leggings (not cotton) work perfectly. The key is choosing bottoms that won’t trap sweat but still cut the wind.
Lightweight hiking pants with a DWR coating handle light snow and wind while letting heat escape during climbs. If you run cold or you’re facing genuine freezing conditions, wear thermal leggings underneath, but skip them if temps are above 30°F or you’ll sweat through them on uphills.
Insulated pants are overkill for most California hiking unless you’re doing winter camping or standing still for long periods. They prevent the natural cooling your legs need during exertion, forcing you to strip mid-trail.
Always avoid jeans and cotton leggings. Once wet from sweat or snow, they stay cold against your skin and increase hypothermia risk dramatically.
Step 6: Pack Strategic Backup Layers
California’s mountains are notorious for temperature swings, that 60°F trailhead can drop to 40°F at the summit, or clouds can roll in and cut the temperature by 15 degrees in minutes. Always pack an extra insulated layer (lightweight down or synthetic jacket) even when you start warm. Include a backup base layer top in case you get sweaty, plus an extra pair of gloves and a warm hat. Women typically feel cold faster than men once activity drops, so what seems excessive at the trailhead becomes essential during lunch breaks or summit stops. The rule: if you debate bringing it, bring it.
California-Specific Cold Weather Considerations
California’s cold feels different than Colorado’s, and your outfit needs to account for that. After years of hiking both the San Juan Mountains around Dillon and California’s Sierra Nevada, I’ve learned that California’s mountain cold comes with three distinct challenges: bone-dry air that sneaks up on you, relentless sun exposure even in winter, and temperature swings that can shift 40 degrees between dawn and midday.
The dryness changes everything about layering. While Colorado winters hover around 30-40% humidity, California’s high country often drops below 20%. You’ll sweat less but dehydrate faster, which means your base layer doesn’t need quite the same moisture-wicking capacity as it would in damper climates. I’ve found that lighter-weight merino works better here than the expedition-weight pieces I reach for in Colorado. The air pulls moisture from your skin so efficiently that overdressing becomes a bigger risk, you won’t feel as wet, but you’re still losing heat through evaporation.
Sun protection matters year-round in California mountains. Even on February hikes above 8,000 feet, I wear SPF 30 on exposed skin and bring sunglasses, the UV index stays high regardless of temperature. Your neck gaiter or buff should offer sun protection, not just warmth. Consider a lightweight sun hoody as your mid-layer instead of a standard fleece; it pulls double duty as the morning warms up.
Coastal ranges present their own puzzle. Marine layer fog can roll in cold and damp, making waterproof shells more critical than in the Sierra’s dry cold. I’ve started foggy 45-degree hikes in the Santa Monica Mountains that felt colder than clear 28-degree mornings in the Rockies. The moisture cuts through non-waterproof layers fast. If you’re hiking anywhere within 50 miles of the Pacific, treat your shell selection like you’re dressing for rain, even if the forecast says dry.
Temperature management requires constant adjustment. Plan to shed your insulation layer within the first 30 minutes of uphill hiking, then add it back during breaks and descents. Pack your puffy jacket even on days that start at 50 degrees, that summit or shaded north face might be 25 degrees colder.
Testing Your Outfit: How to Know It’s Working
The first fifteen minutes of your hike will tell you everything you need to know about your outfit choices. Start walking feeling slightly chilly, this is the “start cold” rule in action. If you’re comfortable standing at the trailhead, you’ll likely overheat once you start moving uphill with a pack on your back.
Pay attention to these telltale signs as you hike. You’re dressed correctly if you warm up within ten to fifteen minutes but don’t start sweating heavily. Your hands and feet should feel cool initially, then gradually warm. You’re overdressed if you’re sweating through your base layer within the first mile, your face feels flushed, or you’re unzipping everything before you’ve gained significant elevation.
You’re underdressed if your fingers stay numb past twenty minutes of hiking, you’re shivering despite active movement, or your core feels cold even as you’re working hard. Women often experience cold hands and feet longer than men due to circulation differences, but persistent coldness signals a problem.
Do a trailhead test before committing to a long hike. Walk briskly for ten minutes near your car. Check your weather basics one more time, especially wind chill and temperature drops at higher elevations. If something feels wrong, head back to adjust layers while you’re still close to safety. Pride isn’t worth hypothermia.
Common Mistakes Women Make with Cold Weather Hiking Outfits
The biggest outfit mistake? Wearing too much at the start. Women often layer up for the parking lot temperature, then overheat within twenty minutes of hiking uphill. You should feel slightly cold when you begin, that’s the sweet spot. If you’re comfortable standing still, you’ll be sweating soon.
Common cold-weather outfit errors to avoid:
– Starting warm instead of starting cold (leads to sweat-soaked base layers that chill you later)
– Choosing cotton leggings or underwear because they feel soft (they lose all insulating value when damp)
– Skipping gloves or a hat because “I’ll warm up” (extremities don’t warm up like your core does)
– Ignoring the forecast’s wind speed and thinking temperature alone tells the story
– Wearing a too-tight base layer that restricts circulation (especially problematic for women’s narrower extremities)
– Layering a puffy jacket under your shell instead of keeping it accessible in your pack
– Forgetting that California’s dry air pulls moisture from your skin faster than humid climates
Women’s bodies typically have less muscle mass and different circulation patterns than men’s, meaning fingers and toes get cold faster. What works for your male hiking partner might leave you freezing. This reality matters especially for winter hiking in California where elevation changes can swing temperatures twenty degrees within an hour. Pack that extra layer even when it seems excessive, you’ll use it.
Next Steps and Further Preparation
Now that you’ve assembled your cold-weather hiking outfit, don’t immediately tackle that all-day Sierra summit. Test your system on a 2-3 hour local hike first, ideally one where you can bail easily if something isn’t working. Pay attention to how your body responds during the first 15 minutes, that’s when you’ll notice if your base layer irritates your skin or your shell restricts movement.
Create a dedicated checklist for California cold-weather hikes that goes beyond just clothing: extra layers in your pack, navigation tools for when fog rolls in, more water than usual (cold air dehydrates you faster), and high-calorie snacks since your body burns more fuel staying warm. Keep this list on your phone and check it before every trip.
Gear upgrades should happen strategically, not all at once. Start with what’s touching your skin, a quality base layer makes the biggest immediate difference. Then improve your shell, followed by insulation. Watch for end-of-season sales in March and September.
Finally, remember that outfit planning is just one piece of trip preparation. Check trail conditions, tell someone your plans, and always bring those backup layers even when the forecast looks perfect.
Building the right cold-weather hiking outfit is a skill that develops with experience, not something you perfect overnight. Start with the layering fundamentals you’ve learned here and test them on shorter trails where you can easily turn back if something isn’t working. Pay attention to how your body responds at different temperatures and activity levels, then adjust your system accordingly. You don’t need to buy everything at once, begin with quality base layers and a decent shell, then upgrade your insulation and accessories as you identify what your body needs most. Understanding women’s hiking clothes cost helps you prioritize where to invest first.
Can I use what I already own for cold weather hiking?
Absolutely, start by checking your existing wardrobe for moisture-wicking base layers and windproof outer layers. Just avoid cotton and test everything on a short hike before committing to a full day out.
How cold is too cold for hiking in California mountains?
Most prepared hikers handle temperatures down to 20°F comfortably with proper layering, but wind chill and your experience level matter more than the number on the thermometer.
Do women really need different cold weather gear than men?
Women’s-specific cuts fit better through the hips and chest, and many women run colder in their extremities, making quality gloves and insulated layers even more critical.
These same layering principles work whether you’re tackling California’s Sierra Nevada peaks or exploring the high-altitude trails around Dillon, Colorado. The fundamentals of moisture management, insulation, and wind protection remain constant across mountain environments. Master this outfit-building system now, and you’ll hike confidently through cold weather anywhere.